Translate this blog....

Friday, December 28, 2018

**RECIPE** Hokkaido Milk Bread (updated with photos)

**I thought I should update and add some photos of actual finished product. Since I have not made the bread yet, I am going to post photos of (and links to) those done by other folks. Please see the very bottom of this post for those photos.**

I am determined to make this bread but all the different recipes and instructions I've found so far and mega confusing. I love watching this video ...


...and am grateful for helpful comments with conversions, but... My brain still hurts from trying to sort it all out.

If anyone has a simpler set of instructions for dim-witted me, please let me know!

As someone commented on YouTube, that is some of the sexiest bread ever.

Here are some more pinups of this yumzy looking bread:

Check it out on Bake for Happy Kids

Source Taste of Asian Food (site not secure)

From Yi Reservation (site not secure)


Peace
--Fre

**REVIEW** Denman Brush

Well.

I have been hearing about the Denman brushes for years but I never tried using one. Until now.


 That is the Denman 5-Row Classic Pocket Styling Brush.


From what I can tell, most people either love, love, love, these brushes or they hate them. Out of all the reviews and articles I read, only a small percentage of people were neutral. On a scale of 1 to 10 - with 10 being the most positive - I land at 8.5.

When I read Amazon reviews, one of the things I picked up on is that some people wondered if they had gotten a faux Denman. I think I got the real deal.


Another criticism I saw was that this brush was too small, but the description does indicate that it is a "pocket" size. Personally, I like the smaller size because I had more control, especially when doing coils.

So, here goes my review:

I wanted this brush for 2 reasons. First, I wanted to use it to do coils (there are lots of vids and other Instructables for this). Second, I wanted it to better distribute products through my hair. Since I had read from some users that the brush had damaged their hair, I wondered if there was a correct way to use it to avoid damage. There is and it's very simple: your hair has to be wet - very wet - and you must work in small sections. Otherwise, yes, there will be LOTS of ripping and tearing of hair.

Since I wanted to do coils and need product for that, I was able to fill 2 birds. The brush worked amazing for creating coils - or at least it did in spots where my hair was "natural". I have a couple of patches of hair at the front of my head that, for some odd reason, lack any curl or kink. When I put product in those spots, the hair just flattens out into a stringy mess. With the brush, my coils were more even than when done with my fingers.

The best thing was the way this brush smoothed product onto every strand of my hair. Even if I don't coil my hair, the brush totally works my creams and softeners into my hair.

I have not yet figured out how (or why) to take some of the rows out of the brush. For now, I love using it as is.

Peace
--Free


Wednesday, December 26, 2018

**REVIEW** Flour Sack Towels (for the kitchen)

For anyone who likes to cook or bake, towels are essential. Towels for wiping up, towels for handling dishes, towels for covering foods, towels for - well, you get what I mean.

I have been getting by these past several months with towels from the Dollar General or the discount aisle at Walmart. You can find some decent kitchen towels at both places, but I never did. Also, I didn't want to spend a lot of money.

Since I've been doing so much baking lately, I decided to try out a couple of affordable brands of flour sack towels I've seen on Amazon.

This first set from Bosubari is just under $10 and is made of a fairly thick and durable spun cotton.


The next group is from Utopia Kitchen and came in a 12-pack of ring spun towels for about $16.


At first, I was going to review these towels as to which set was better. After using and laundering both, I can't really put one over the other. They had different qualities that I like. Let's look at the Bosubari set first.


Bosubari Towels Pros & Cons


PROS
  • Thick, sturdy and has a little weight
  • Good for covering dough during proofing
  • Can be tucked into the waistband and used for an apron


CONS
  • Not as good for cleaning messes & didn't launder as well as the Utopia Kitchen towels
I find that I use these more when I'm baking. Mostly I use them for covering doughs during proofing or for keeping finished bread from drying out. They were too thick for me to use as padding for a lid when steaming some bao buns recently.

Utopia Kitchen Towels Pros & Cons


PROS
  • The lighter weight makes them versatile
  • Thin enough for cleaning messes and spills
  • They launder better than the Bosbari towels
CONS
  • Some came out of laundry with irregular shaping/didn't square up

Overall Impression of Both Sets

These are the Utopia Kitchen towels, but
the Bosubari also had a cloth tie

I am happy with all the towels. Because of the general quality and usefulness, I would have saved money by buying these in the first place instead of getting all the cheaper towels. They have held up well under washing and using so I expect to have them for a while. 

I think of the Utopia towels as very "every day" and utilitarian. The heavier Bosubari towels are, in my opinion, more "chef-like".
The main test of a product is whether users would purchase again. Would I buy more? Absolutely. I decided a couple of months ago that I will only be giving the most useful things as gifts. These towels are on my list to give to the cooks and bakers in the family.

Peace
--Free

Thursday, December 20, 2018

**REVIEW** GoWISE USA 5.8-Quarts 8-in-1 Electric Air Fryer XL

While I do love my Instant Pot and am so very glad that I got it, it does not crisp foods. If I want to fry something or put a crust on chicken or fish, I have to move them to the oven. Or just fry them in a skillet. (There is a Saute function that browns some foods, but I have to figure out how much oil I can use...)

Until I figure out how to use the IP for shallow frying some foods, someone suggested using an air fryer for a healthier diet. This is the one I snagged on one of the recent Lightning Deals.

looks like something out of a sci-fi movie

That, my friends, is the GoWISE USA 5.8-quart Air Fryer. I'm not thrilled at the "8-in-1" label they slapped on this thing. The 8 they mention is just for the 8 presets on the control panel. What this could correctly be called is a 4-in-1 because it will fry, bake, grill, and roast. So. Yeah.

Let me just say right off that this thing is a lot bigger and -heavier than I thought it was going to be. A LOT. ** On the other hand, the one thing I liked right off was how attractive the unit is. I didn't appreciate this fully until I turned it on.


It's pretty, but so are most "bimbos"

Okay, so with that out of the way, let me go over the Pros and Cons I see after having used this on 2 items today. I cooked fresh cut potato fries first, then I attempted to crisp a game hen that I had already cooked in the Instant Pot.

PROS -
  • The basket is rather large and roomy. I was able to fit a whole cornish game hen inside - one a small metal rack - and had room for a second hen if I'd wanted.
  • The unit runs fairly quiet. I was able to hold a phone conversation easily while it was running.
  • It's attractive, especially when powered up. For someone with enough counter space, it looks nice enough to leave out when not in use.
  • Air frying certainly seems safer than pan-frying with oil.
  • If cakes turn out well using the fryer, that will be another Plus.
CONS - 
  • I was not thrilled with the results of my fries when cooked to the suggested time and temp. I will probably adjust to a lesser time to get the crispiness I want without drying out the potatoes.
  • The hen did crisp up but didn't look very appealing. I am hoping that battered chicken with come out better. Again, I think the results might be better with adjusted time and temps.
  • I don't think that the presets are very useful and I will need to come up with my own or look to other users for better ones.
  • The control panel can be a bit confusing, especially as to the ones for setting the cooking time and the alarm time. Some buttons seem, in my opinion, to be completely useless. That could be user idiocy.
  • The unit is large, which is a good thing for those with room for it. Because the air vents need to be kept away from walls and things that melt, that adds to the space needed when running the machine. I had just enough space to safely use it. Storage is also an issue for small-space homes.
  • Getting the basket out took a little bit of hand strength. This could be a good thing because I know now that it won't just pop loose when I am shaking food in it, but it was also a bit annoying.
  • The normal price of the unit is, again in my opinion, a bit high for something of a single-function. An oven can replace the fryer in most instances for those that want healthier options to pan-frying.
  • Clean-up is not fun. I even lined the bottom of the pan with foil (which helped) but still had a time maneuvering the big pan around in sink to clean it.
  • I expected better from the fryer as far as appearance and textures of food. 
I'm not sure why appliances that do basically one thing are so expensive. I snagged this one on a deal, but today the price shown is $79.00. Unless I can do get more day to day use from this, I would not spend that amount for the fryer.

You can see that I found more negative than positive about the fryer. However, I have not fully tested all it's supposed to be able to do. I might have to update this when I've tried cooking more foods in it. If this works well on cakes, that might be a huge positive.

And, if I have to be stuck with it, at least it's a quiet thing...


Again, I don't see a huge advantage of using this over using a stove - other than the fact it might cut back on heat in summer months. Frankly, this is not an appliance I am that excited about. I am considering sending it back but that means forfeiting $15 for a return shipping fee... ~sigh~

Peace
--Free


P.S.: I fried some chicken cracklins (seasoned skin) and some gizzards. These turned out pretty good so I am a little happier with the product.

** NOTE about the size of the product - this is about the same size as the 8-quart Instant Pot, as you can see. However, it is a great deal heavier to lift and store on top of my fridge.

Monday, December 17, 2018

**REVIEW** Eco Friendly Machine Washable Reusable Bamboo Towels

As with the milk powder I tried, this is another item that I am counting on to save waste and money.


That is a roll of Bamboo Towels - Heavy Duty Eco Friendly Machine Washable Reusable Bamboo Towels (my emphasis)

I was a little skeptical about these washable and reusable bamboo paper towels. Basically, I wondered if they would work without falling apart. I also wondered if they would really work as claimed.

My first test was to wet a towel and clean one of the kitchen counters. I used soap for the first wipe-down, then I used a spritz mix of alcohol and water. The towel held up really well. It didn't shred or leave any fuzz/residue on the surfaces.


The next test was to rinse the towel out with some soap and let it dry. I wanted to see if it retained its original strength and cleaning properties. It did.

At this point, I was feeling pretty impressed. I don't know how long these will last but I'm going to treat them exactly as the packaging suggests and update this review down the road. If they last longer than a month, that would be saving my use of at least 3 rolls of these Viva paper towels I have preferred - and which cost about $9.50 for 8 rolls (with 88 1-ply sheets per roll).

Here's a little more info about the reusable towel:

  • There are 20 sheets of 11x12 perforated sheets to a roll.
  • They are made of a sustainable "bamboo source" (made into a type of rayon material, apparently)
  • For concerned folks, these aren't made of wood from "normal" trees.

What about the "rayon" in "bamboo rayon"?

Some Amazon reviewers noted that there is actual rayon in the product and when I checked my package, sure enough, there was a note about rayon.


 Did you see it? Me either. Until I squinted.


Now, I myself am not troubled by using rayon to clean items in my home. Also, for those who are concerned, I found an article that somewhat clarifies the issue of bamboo rayon fibers. What does bother me is that the rayon part seemed to be hidden. This is a copy/paste of the product description on the product page:
Our heavy-duty bamboo towels are stronger, more absorbent and durable than regular paper towels. They are made from sustainable certified organic bamboo source with each roll can save up to 60 conventional paper towel rolls and fits in your regular paper towel dispenser. These 11" x 12" perforated tear off sheets are machine washable and reusable up to 120 times before discarding. Use these bamboo towels just like how you normally use conventional paper towels. Hand or machine wash and air dry for best results and longer life. They are soft enough to be used on skin and tough enough to be used as shop towels, our bamboo towels can be used almost anywhere. Perfect for household cleaning, travel, car, bathroom, pets, camping, personal care, daycare and more. Unlike normal trees, bamboo is one of the fastest growing plants in the world, growing up to 3 feet or more day and is grown without pesticides, fertilizers or irrigation, making it an eco-friendly and sustainable choice over cotton and other plant materials. (emphasis mine)
The positives of bamboo and lack of certain items are played up but the rayon is not mentioned. That just seems sneaky. Notice the emphasis I made in showing the listed product name at the head of this post.

Care and Upkeep

Because these are reusable, I wasn't expecting them to be totally easy to care for, but I am glad I paid attention to the packaging. My instincts would be to toss them in a washer/dryer, then iron them. That would be wrong.

These are to be machine or hand washed but with no fabric softener. They must be air dried and not ironed. 

Bottom Line
PROS - 
  • Softer and more pliable than I expected, making them great for cleaning and drying items
  • The size is large enough that one is adequate for most cleaning
  • They are quite absorbent and thick
  • They are tough and don't tear or shred easily (at least not after my first use)
  • Will replace a lot of traditional paper towels
  • They rinse out well - even after wiping stain-like messes
  • There isn't a lot of shrinkage after wetting or drying

Top - dry towel
Bottom - wet towel

CONS -
  • They have to be air dried so need a place to hang
  • The sort of hidden rayon issue bothers me
Honestly, I really like these a lot. I am going to mention to the seller that the note about the rayon shouldn't seem so hidden. At any rate, I will most likely purchase these in the future - maybe from another seller.

Peace
--Free

Saturday, December 15, 2018

**REVIEW** Hoosier Hill Farm All American Whole Milk Powder

When you have a tiny household sans kids, it's hard to keep certain foods and staple items on hand without them going bad. I can always freeze vegetables (and some fruits) and I have learned to vacuum seal a lot of other things (flours, meals, mixes) to keep the bugs and other critters out. The one thing I waste the most though is milk and cream. I've tried freezing them but their texture (and, in my opinion, taste) are affected. I like shelf-stable - or UHT - milk and it's pretty tasty but I can't find a good price for the whole fat that stores will ship. Also, for some reason, once opened, it seems to lose freshness quicker than does "regular" milk.

Anyway, I wanted to try a whole milk powder. This is one that I now have:


That is a whole milk powder from Hoosier Hill Farm via Amazon ($15.15 at time of this review).

What I was looking forward to before anything else was taste. Also, I wanted something that was mostly or only milk. I didn't want a bunch of additives and such. The Hoosier Hill Farm milk is simply powdered whole milk. NOTE: One Amazon reviewer makes note that the product is "packaged in a facility shared by treenuts, peanuts, dairy, soy, and wheat products". Good to know.

Taste is the next and equal criteria. This one passes the test, It's really pretty yummy. I drank some straight (and not cooled) and liked it. I really liked adding it to my coffee. It had a slightly sweeter taste, in my opinion than my usual refrigerated variety gallons.

Now here is where it might seem like the powdered milk is way too expensive:
Ouch, yes? Not really.

When I spend that 3 bucks and change on "regular" whole milk and end up having to toss out some - sometimes as much as half the bottle and usually as much as the last third - I'm not saving a cent. I have saved slightly soured milk for baking but that was just so I didn't have to throw it out. With the Hoosier Hill, I can use the milk by the teaspoon if I want. Or, if I happen to need more, there are instructions for mixing it by 1/3 gallons. I will most likely be mixing it up by the cup since that's how I use for baking things or having the random bowl of cereal.

Another great thing is the shelf life of 7-9 months and that is if kept on the shelf. I have read various sources about shelf life. One states 3 years at best taste if properly stored, but safe to drink for a longer time. Another source states that if stored properly (sealed and in a freezer) the milk will last indefinitely. Now that means vacuum sealing it and freezing - not just closing up in a bag. Most sources go with "indefinitely".  I'm not stockpiling (yet) or looking to keep the milk forever. I just need it to last until I finish with it.

This is how I packaged mine for storing:


(Once again, folks, I have to tell you that Next Shine Food Sealer has paid for itself three or four times over.)

I kept out one slightly smaller quantity for the fridge so I can pull it out and use by the spoonful. I'm kind of excited that I won't be pouring any more chunky milk down the drain. When I can afford to, I plan to try some of the other powdered dairy products from Hoosier Hill Farm, especially the Premium Heavy Cream.

I do suggest that you use a blender and/or warm water for obtaining a good consistency, then refrigerating for taste. For baking, I will stick with warm or room-temp liquid.

Let me add another observation about mixing this product: I think that you can use slightly more or less powder depending on what you need the milk for. When baking, I plan to stick strictly to the suggested measurements. For my coffee and cereal needs, I will probably skimp a bit.

All in all, I think that I picked the right brand for my first try at powdered milk.

Peace
--Free

Sunday, December 09, 2018

Family News and Upcoming Reviews!

Posting has been slack because... I ran out of all the scheduled posts I'd set up and... I have been visiting my family. We have a new member of the crew:


That is my darling little grandniece. Isn't she just the loveliest little person?

Also, I got so see my little man DJ Boo.


I have missed that kid SO much the past year and a half. I have to share a little story from our reunion...

He did not know that I was coming to town. When I got to his house, he was in his room playing or cleaning up. His mom and older cousin went in before me and told him that he has a big surprise and saying "Guess who's here, DJ?"

When he stepped into the hallway and saw me, he just stood about 5 feet away staring like he just couldn't believe his eyes. He looked at me like that for a good half a minute before he ran over and hugged me.

"Booboo! You came back to me!!!"

That is what that kid said. Then he started bawling and I started bawling. Oh man. How I do love that kid.

Meeting his newest cousin
and making sure the nurse is careful!


I don't know WHY we look so slow
Yeah... We are a bit "special"


cuzzins 


It's really true #familyiseverything

All the excitement and kind of early Christmas with this part of the fam has worn me out. I will be down for a minute because I got a bit ill, but will be catching up on the reviews as soon as I can. Once I am back up and running, this is what will be coming:
  • Target Beauty Box (Holiday)
  • Hoosier Hill Farm All American Whole Milk Powder 
  • Bosubari Flour Sack Tea Towels
  • GoWISE USA 5.8-Quarts 8-in-1 Electric Air Fryer XL 
  • 8QT Stainless Steel Stackable Steamer Insert Pans (for Instant Pot)
And if you are wondering about the 8 quart Instant Pot pans, that's because I traded up from the 6 quart IP. Since I actually use the device so much, I decided to go for it in a larger size. I told you guys, I may never use my stove again. And, yeah, I can't wait to review that Air Fryer.

I will also be doing a review of America's Best Eyewear. I had a little seeing problem when I lost my last contacts and realized my RX was outdated. Had to run over to the cheapest place and... well, you can read the review soon. In the meantime...

Peace
--Free

Friday, November 30, 2018

**REVIEW** Marrakesh Hair Care Original Skin Butter

Let me start this review by saying that the seller I got this from on Amazon is The Beauty Box. It's important to know the seller because, well, some sellers might not be as good as others. Recently, I was extremely unhappy with the Marrakesh Hair Care Argan and Hemp Styling Oil that I got from a particular seller. (The review for that will be up soon. I wrote it a while back but messed up the scheduling of the publishing... My bad.) Anyway, keep track of sellers you do an don't like! Now, on to this review.

If you love the smell of Marrakesh Oil (in the original scent) and I have never met anyone who does not love it, then this is a nice product to have.


Marrakesh did an awesome job on this skin butter which, on the product page, has this full title: Marrakesh Hair Care Original Skin Butter.  You can tell they know that people are buying the skin butter for the scent of the hair products!

It has that amazing soft and sultry and kind of sugar-musk scent or the hair oil and it's surprisingly more moisturizing than I expected. Because I love the Marrakesh scent, I would probably loved this as a lotion anyway, but thankfully, it is highly moisturizing. I used to rub some of the hair oil on my cleavage just because of the scent. Now I have the lotion and don't have to waste the more expensive oil just for the fragrance.

While I can only ever buy the oil ($22.99) when it's on sale or when I have a gift card or something, the $12.99 Skin Butter is more in my price range. And it will last a lot longer. (By the way, I also tried the Marrakesh Leave-in and will not be buying it ever again because, well, what a waste. It only does a so-so job and only if you use a LOT of it. No thanks.)

It's hard to tell from a photo, but the butter is medium thick but has a lot of slip on the skin. I kind of wish it came in a glass jar instead of the plastic one, but...

There is not much else to tell you about the Skin Butter. Like I said, I can tell that it is going to last a while because it only takes a little dab to moisturize both my hands. I can also rub my palms across my hair for a nice fragrance. The downside is that the scent is not long-lasting. That might totally be my fault. Since I've aged, my body chemistry kills perfumes like crazy.

Bottom line is, the price is good and the quality (from this particular seller) was good. Also, I don't have to buy the hair oil just to get that lovely fragrance.

Peace
--Free

Thursday, November 29, 2018

UPDATED **REVIEW** Marrakesh Oil from Amazon Seller SleekHair

*UPDATED** I finally found a candle-fragrance oil that mimics the smell of this hair product. I don't think that the producers of Marrakesh Oil would appreciate my sharing that info. I can tell you that if you shop for fragrance oils containing various Amber blends or Egyptian-African-type scents. I think that if you can find some of these fragrances separately, you could come up with your own Marrakesh-type fragrance. I have been mixing my oil into my lotions and hair products.


Ugh.

Nothing worse than getting a bum product. Well, maybe it's worse when you needed the product asap and when it arrives, it's a bum product.

This right here is what I am talking about


I LOVE Marrakesh Oil, but I am not happy with this seller. And, yes, since I review so many Amazon products, I am going to start calling out poor seller performance. I got this particular oil from Amazon seller SleekHair. They seem to have a good rating but there are a couple of complaints. Anyway, on to the product.

Marrakesh Oil and I are old friends. It's great stuff for 2 reasons: it smells delicious and it does a good job on my hair. Of course, like so many things I like, the oil tends to be pricey. I only indulge myself every blue moon.

When I got the oil (I also ordered another Marrakesh product from a different seller), I was so happy that it arrived on time and intact that I went ahead and gave the seller with a 5-star rating. That was a mistake.

As soon as I opened the oil and I should have known something was wrong. It felt like Marrakesh Oil and the bottle looks legit. The giveaway was the scent - or I should say lack of scent.

Anyone who has ever used (good) Marrakesh Oil knows what I mean. The oil has a unique, smoky, musk-ish fragrance that I'd love to have in a perfume. I was so busy treating my hair that it took a moment before I realized that I wasn't being soothed by that lovely aroma. Matter of fact, there was no aroma at all with this oil.

Now understand that a small 2-ounce bottle of the oil goes for around 22 bucks - no matter where you buy it. In the past several years, I've gotten it from Sephora, Ulta, beauty supply stores, and Amazon. I think that at one point some years ago, I got a bottle for around $17. Times change.

At any rate, this oil lacked the distinctive fragrance and that scent is a big part of why I splurge on the product. Since I had it though, I decided to go ahead and try using it as a part of my moisture sealing routine.

It looked normal.


My hair was freshly washed and towel-dried. I worked in a little bit of leave-in conditioner - the Marrakesh that I will review in another post - and then applied the oil in sections. It looked and felt a lot like legit Marrakesh but... something just wasn't right. I checked in the mirror and saw that the oil had added none of the usual shine.  First, no smell, then lackluster performance. I pulled out my magnifying glass and flipped the bottle around.

Huh.


That's odd. Most labels like this on Amazon-purchased products are very clear. I couldn't see an expiration or sell-by date or anything. And my feeling was that this bottle was either old and expired or just not the real deal. Most likely, the former. I want to think that I probably smeared the label when I was using the oil, but it doesn't matter. I'm not happy with the product.

I finished applying the oil to the rest of my hair, wrapped it for the night and awaited results. Next morning, no shine and none of the sealing I am used to.

Of course, I got in touch with Amazon and they refunded my money. I'm scared to buy any more of the oil online so I will wait until I go to Arizona and look for some in a beauty supply or (if my family is feeling generous) a Sephora or Ulta.

By the way, I deleted the Seller rating and am waiting to be able to update it. If nothing else, they need to be better about quality control.

Peace
--Free

P.S.: For those who just love the smell of (a legit) Marrakesh Oil Orignal Scent, I found a whipped body butter. The scent doesn't last as long as I would like, but the butter is actually very moisturizing. I use it as a body cream and as a light hairdressing.


Wednesday, November 28, 2018

**RECIPE** Amish Sweet Bread (SOOO easy!)

I recently stunned myself by baking a wonderful loaf of bread. I can cook and I can do a cheesecake when the moon is right, but I'm not generally a baker. I've never been patient enough. However... I found a recipe for an Amish sweet bread that is so easy even I can't mess it up. It helps that the people at Big Family Homestead. This link is to the YouTube channel where I found the recipe but they also have a website with a bunch of other recipes and stuff.

This is the video but, for those of you like me who want the thing written out, here is my transcription:

INGREDIENTS (for 4 loaves)
  • 4 cups water (almost too hot to touch)
  • 1 1/3 cup sugar
  • 3 Tbls active dry yeast
  • 3 tsp salt
  • 1/2 cup oil (I used canola)
  • 10 to 12 cups flour (I used all purpose)
  • and a bit of oil, butter or lard to grease pans
EQUIPMENT
  • 4 loaf pans (mine were about 5 x 9 - or 1.5qt)
  • A large bowl for mixing the dough and letting it rise (or "proof")
  • damp towels or some plastic wrap to cover the dough
  • a surface to be floured for kneading the dough
  • a knife or dough cutter for sectioning dough (and for scraping/cleaning kneading surface)
  • Cooling racks (I used one of the racks out of my oven)
NOTES:
  • It's currently cold & dry where I live so I warmed the kitchen and raised the humidity by keeping a couple of pots of water simmering on the stove.
  • Do be patient. My dough needed a little bit more time to rise than the recipe calls for.
  • If you do substitute self-rise flour for the all-purpose (I did in one loaf), cut out or cut back on the salt. I cut the salt out and everything was fine, but I might have lucked out.
STEPS:
  1. Flour the surface where you will be kneading your dough on later.
  2. In the large mixing bowl, dissolve the sugar into the warm/hot water.
  3. Add the yeast to the water mix and stir just very enough to wet the yeast. Wait until the yeast begins to foam a bit. This took longer than I expected.
  4. Add the oil to the mixture and stir lightly.
  5. Add about half of the flour. (NOTE: This is where I blended the salt into this half of the flour to incorporate it well. That way, if I don't need all the flour, I won't have forgotten to blend in the salt.)
  6. The first half of the flour (and the salt) will make a soup-like mix. Start adding more flour and stirring, a little at a time until you have a sticky thick dough that you can turn out onto your floured surface.
  7. Add some flour to the top of the dough so that you can begin kneading it. You will keep adding flour until you have a dough that is no longer sticky. It took me about 7 minutes(not just the 5 to 6)to get my dough right.
  8. Pat or tuck the dough into a ball and put it back in the bowl to rise (or proof) for about an hour - or until the dough has doubled in size. This is where you want to cover the bowl with plastic wrap or a warm damp towel. (The damp towel worked best because of the drier air in the apartment.)
  9. While waiting for the dough to rise, clean the kneading surface and re-flour it for later.
  10. Take the risen dough and turn it out onto the freshly floured surface and knead it into a smooth ball. Flatten the ball of dough out so that you can divide it into 4 equal parts.
  11. Make the loaf shapes by rolling each section of dough into a thick log. Tuck the sides under the bottoms so that it sits nicely into the loaf pan.
  12. Cover the loaf pans with your towel or plastic and let the loaves rest for about 45 minutes. (Remeber to pre-heat your oven at about the 35-minute mark.)
  13. While waiting for the dough to rest, it's a good time to clean up all the flour where you kneaded.
  14. After the 45 minutes, put the loaf pans in the heated oven and bake for about 30 minutes.
  15. While bread is baking, set out your cooling racks.
  16. As soon as you take the bread out of the oven, turn them out of the pans and onto the cooling rack. (This keeps the hot bread from getting soggy in the pans.)
  17. You're supposed to wait for the bread to cool to be easier to cut, but... I sliced mine after about 15 minutes and it was fine!
That's it. It's super easy and most of the time is taken up waiting for the dough to rise and then bake. I hope these directions aren't tedious but I need step-by-step instructions so this is how I transcribed the recipe. I think I had to pause and rewind a thousand times before I got it all down. 

I actually pulled this video up on my tablet in the kitchen while I was making my bread! Here you go:


BENEFITS OF BAKING


It's a mood-lifter
Like I said, I am pleased with myself that the bread came out so delicious. The other thing I discovered is that baking is a great reliever of anxiety and depression. I was having a severe bout of anxiety and couldn't sleep for over 20 hours. The baking gave me something to do that I could do without getting frustrated by the tasks. Later,  the smells of the bread in the oven soothed me a lot. Once I finished those first loaves, I was able to settle down and get some sleep. It was all very therapeutic.

It tasted healthier
I don't want to forget to mention another important benefit to making my own bread and that is the calorie factor. I'm not going to say that eating 5 slices of this bread was the best breakfast I could have had but it sure was better than eating bread loaded down with preservatives. At least I know exactly what went into my own bread and I did not feel bloated and stuffed (even after 5 slices with butter) after eating it.

The more expensive breads are touted to be healthier but they still have lots of ingredients I may not want. My own bread was made with only SIX ingredients - including the water. Here is an article from Naturally Savvy that discusses some typical store-bought bread ingredients.

It was cheap to make
I can get a loaf of bread here in my town for $0.99 - $5.00. The cheaper bread is not always the freshest or tastiest. When I got ready to make my bread, I didn't need to purchase anything in addition to the staples I always have on hand. Now, I don't normally have yeast on hand, but I did this time and it's not something I find too expensive to make a staple item. Not only can I get huge bags of flour and sugar on the cheap, but oil and yeast are not too pricey. Basically, this bread cost me very, very little to make.

I hope some of you get to try this recipe. I love the Big Family Homestead YouTube channel and just saw their recipe for cinnamon rolls... Transcribing takes me a lot of time, but I will work on that recipe when I can.

Here is how my bread turned out the very first time!


Peace
--Free

Monday, November 19, 2018

**REVIEW** Instant Pot DUO60 6 Qt 7-in-1

Welp. I finally got my Instant Pot, thanks to a dear, dear friend who heard about my wishes via social media. I truly am a blessed woman in the friend department.

Let me start by saying that I wondered if all the hype was deserved. I will let you know in a moment what I have determined for myself.

Another thing you need to know is that I will never understand why this thing is not called the InstaPot. That's what I always called it and when I first noticed it was "Instant Pot", wondered if I wasn't under the Mandela Effect!

Anyway, here is the famous Instant Pot (aka IP):

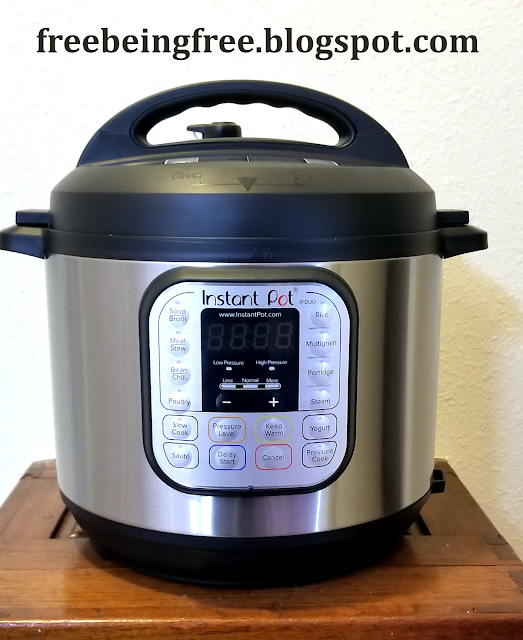
You know that "InstaPot © ™" sounds so much better!!!

There are a number of models (and capacity sizes). I got the Duo60 in the 6-quart. I'm single but often cook enough food to last for a week. Also, I want to be able to cook a whole chicken (or very small turkey) in the IP.

My first impressions...
I like that the inner pot is stainless steel. I've been mainly using my cast iron and trying to stay away from everything else (copper, Teflon, and other potentially harmful materials).

My IP doesn't have the same markings as some of the other Duos I've seen online in videos and the like. I have the simple 2-line markings instead of the 4 or more lines I've seen. After watching a lot of videos and reading multiple reviews, I notice that it seems to be a thing that people get different types of lids and inner pots on the same models. Not a big deal, but I would have liked to have more detailed markings.

It's a very nice looking machine and quite a bit heavier and bigger than I expected (which is a good thing, IMO) and much nicer looking than this or other photos show. I have a very small kitchen so I keep my IP on top of the fridge when I'm not using it.

The instruction booklet was decent but, in my opinion, fell short in some ways. For people new to using any type of pressure cooker, I think there should have been better information about a few things. You will see what I mean in a moment.

To give you a newbie's perspective, I'm going to share the notes I took when getting ready to deal with this thing for the first time.

Now, on to the prep and use

Right off, I had a couple of concerns about the idea of using a pressure cooker since I grew up watching my mom use the old-fashioned - and potentially exploding - kind. I wanted to totally understand the steam/vent settings. Understand that some of what I'm going to say might not be as much of a concern for you. I have cognitive issues and have to read and re-read instructions.

The markings for the steam/vent settings are just embossed on the black lid and hard to read. I literally had to use my camera light to see them before I started testing out the machine.


Also, in the above photo, notice the icons - wave lines and puff cloud. The cloud made sense for the venting setting (releasing steam when done cooking), but the wavy lines... I wanted to set the machine to be sealed but the knob only turns as far as the wavy lines. I was worried that my knob might be broken or mis-positioned. I scoured the internet before I was reassured that the IP was indeed sealed once I turned the knob to those wavy lines.

The IP did come with a not-bad manual (and a cookbook!).


However, the diagrams could have been better for us newbies. Also, as a former imports brokerage trainer who wrote manuals, I believe instructions should be simple but complete. They should never be the least bit confusing.

Not to harp on the whole "pressure cookers can be scary" thing, but one part of the user manual made me anxious and sent me running back online for clarification. I was already worried about the positioning the knob correctly...


... but then there this mention of an "anti-block" shield. Well, that does sound kind of important since it's up there in the underside of the steam knob.


After checking around, I think I have that figured out. Don't take this for gospel but I believe the little metal (not the rubber one) covering shown in the diagram is to stop frothy foods from clogging the steam release. I think. I wish the instructions would have noted that right next to the diagram. I also wish it had been noted that the thing only needs to be removed for cleaning it out.

Some more newbie stumbling blocks...
On the Pro side, the user manual includes a "test run" for newbies to see how the machine works. On the Con side, I was a little scared of the test. My main issue was that I didn't know how to tell the machine was working.

A "Start" button would be nice. Even a "Go" button would work. With this IP, you key in the settings (whether to saute or steam or pressure cook) and, if needed, adjust the timer and pressure levels. That's it. I could kind of tell that the machine was working because the display popped up an "ON" message. That's handy (and then I noticed the instructions for test run noted this) but, still. I want to be a little more in control here.

There is a "Cancel" button. Now that I have learned when the machine is done and safe to be opened, I always hit Cancel. I hit Cancel and immediately unplug the machine. I am always worried about leaving any appliances on. I even unplug the manual coffee pot I sometimes use.

One lesson I learned right away was where to place the IP in the kitchen while using it. In the pressure mode, steam will need to be released. During the test run, I had the steam nozzle directly under the spice cabinet. Luckily, I realized this in time and moved the machine. Not only could I have damaged the cabinets but I likely would have risked drying out my spices when all that moisture evaporated. When I use the pot now, I put it away from counters with overhead cabinets. (Actually, I have such a tiny kitchen, I only have one such counter!)

Lessons learned from experienced users...

I learned much more from other users' videos and informative blogs than I did from the manual. Some users highlighted what they learned from the manual and their experience and I appreciate that.

I learned not to use the IP on the stove. And by that, I mean not to set the IP on the stove because, well, maybe you have a tiny kitchen... (I couldn't have done that because the stovetop is  too small!)

That some people forget to insert the lining and just pour water or food right onto the IP heating element doesn't surprise me. I could totally see myself doing that so I make sure to always, always, clean and place the inner pot back.

One of the first videos I watched really helped ease my anxiety about my first time with the IP. The lady in the video was so awesome that I watched a couple more of her vlogs. Her channel is Naturally Brittany and here are her vids I loved:


She does a yogurt lesson but that's going to have to wait until after I master the cheesecake this dude did...


But getting back to basics here is another helpful video for newbies


When you get your user manual, you will see that there are Facebook groups and other places on social media to connect up with other IP users.

Is it worth the hype?

Yes. Yes, the Instant Pot lives up to its popularity. Once I got over my fears of working with a pressure cooker, I fell in love. I have some main reasons:

  • I can cook frozen meats - no waiting to thaw
  • Juices get locked in on my chicken and burgers
  • Cleanup is crazy easy - both for the kitchen and the IP. It's mostly one-pot cooking so I only had to straighten kitchen from food prep.
  • My first meal was tough collard green stems (that take forever to cook on the stove top) and some chicken breasts. I did both things at one time in about 7 minutes cook time.
  • I get more flavor out of my food because the water isn't evaporating away. (Those burgers were the juiciest ever.)
  • Even if I never use the Yogurt, Porridge, or Multigrain settings, I am getting more use out of this than any other cooking appliance I have. (And I might actually use those 3 settings soon.)
  • I'm less tempted to microwave my food. It takes so little time to cook things that I don't mind spending some on seasoning and dressing up the food.
  • It really has been healthier for me. Two meals in and I have had lots of fresh veggies and non-fried meats.
  • Because I know that cleanup is going to be quick and the food will be ready faster, I don't mind cooking even when I'm not feeling my best.
And let me just admit that what really hooked me on the IP was when I saw the guy making a cheesecake that came out nicely. That is the next project for this Instant Pot.


Peace
--Free

Saturday, November 17, 2018

UPDATE **Seen & Sharing** Ice Cream

UPDATE: I have no idea what all happened with this post. I think I ran it once, but I am not sure if I had all the photos included. Here is the post just as if I never ran it before and with some good photos. I have since learned to make the ice cream with chocolate and also with nuts. This post only includes what I have done with the vanilla version.

I am SO going to start sharing some of the very cool stuff I run across online. I'm going to tag the posts as Seen & Sharing and since I see cool stuff all the time, I'll have lots of posts in the future,

This week, while I was laid up not feeling well, I saw a video that really cheered me up because it brought back childhood memories of my mom's kitchen skills. It is this one from Tasty and it shows how to make chocolate ice cream - without all the equipment and stuff that Mama used. Stuff I will never have around my tiny kitchen!

Homemade Vs. Store-bought: Ice Cream


Shut UP, right? How freaking cool is that? I'm going to try making a batch when I am feeling better and I will post about it. Once I saw the video, I checked out the Tasty YouTube channel (and subscribed) and found out that there is an app from Buzzfeed for Tasty.

If you thought the video was cool, you are going to be blown away by the Tasty phone app. It's unlike any other recipe app I've ever heard of. Not only are there a ton of recipes that are really easy to search through (and save as "favorites"), but there are short video clips for each step in a recipe. I have issues so visuals make life so much easier.

By the way, after I saw that ice cream video, I wanted to know if I could do a batch minus the chocolate without throwing things off balance. I didn't find the answer on Tasty, but I found one over on Kitchn.com.  This is a 2-ingredient, NO CHURN ice cream. The recipe is especially awesome recipe because options like adding fruits and different flavorings is explained. I sent that one out to my friends. Go check it out. And by the way, if you don't have the sweetened condensed milk around... Yep, there is a recipe for that too. The internet can be lovely.

Okay. So the other cool thing I saw and want to share is this info for how to make a homemade bleaching gel pen. Just like the person who posted the info, I think the storebought pens are outrageously expensive - but I have used them and love them. Anyway, I wanted to pass it along in case anyone wants to be a maverick and try it out.

So, big thanks to Tasty and Kitchn for this episode of Seen & Sharing.

Here are photos of my first try at the ice cream. It turned out AMAZING. I did add 4 cups of cream because I didn't want anything to be too sweet. That was overkill and next time I will do 3 cups (not the recipe suggested 2 cups). My neighbor who loves ice cream gave me a big thumbs up! Yay, me.

This is at the point I am starting to fold the cream into the condensed milk mix. This is also where, when I made the chocolate flavor, I added the melted chocolate chips. I learned to add some of the chocolate fully melted and add some of it just crushed up. That made a really nice texture to the latest batch. (I gave that batch away to my SIL before I took photos!)


This is what the batter looks like once the cream and condensed milk are all blended and ready to pack into a container and freeze.


This is what the batch looked like after about 4 to 6 hours in the freezer. The wax paper kept the top from developing frost crystals.


And this, my friends, is what the delicious ice cream looked like at serving. It was SOOO good. My family loves when I whip this up and I can't wait to make some for my little DJ when I go see him. The taste is a lot like what I remember McDonald's ice cream being like several years ago.


Once again, I am so sad that I didn't get photos of the chocolate. I will try to remember to add some the next time I make a batch.

After experimenting with different additions and flavorings, I have decided that the chocolate version is best when using bittersweet chocolate and leaving some of the chocolate unmelted. I wasn't crazy about adding nuts (I did walnut and pecan), but I did learn a trick when I do add them: don't put the nuts in until the ice cream has been in the freezer long enough to start thickening (about 1 1/2 to 2 hours). That way, you can stir in the nuts (gently) and not have them all clump together or sink.

Peace
--Free

Tuesday, November 13, 2018

**REVIEW** KOSE SOFTYMO Speedy Cleansing Oil

When I learned about (and fell in love with) the Kikumasamune Sake Skin Lotion High Moisture, I also heard of the Speedy Cleansing Oil. The oil is featured on the product page for the lotion and both are often featured together on other sites. As with the lotion, I can't read much of the label.

I can read about 6 words here :-)

I am happy to say that the oil works just as well - or even better - than described. I have already been using oils to clean (and moisturize) my face for years. I've used whichever of my fave oils I have around - olive, vitamin e, jojoba, pumpkin or watermelon seed, coconut, castor, etc. Depending on which oil I've used, I've had to add another oil or mix with water to thin it out. The Speedy Oil is a one-step deal.

The ingredients in the Speedy Oil as shown on the Amazon product page are simple. When I was looking for other reviews, I found a wonderful resource (which I will be checking out on a regular basis now that I've found it) called My Dad the Chemist. The blogger, Emily, provided such a detailed overview of the ingredients that I'm poaching:

  • mineral oil: an oil that has been found to help improve softness of skin and lend benefits to the skin moisture barrier function, according to this scientific review
  • peg-8 glyceryl isostearate: an emulsifier that helps mix the water and oils in this formula together
  • cethyl ethylhexancate: an emollient
  • cyclomethicone: another emollient
  • jojoba seed oil: has been shown to help provide anti-inflammatory benefits for skin, according to this study
  • isostearic acid: a surfactant, which helps the oils in this formula wash off when you apply warm water
  • glycerin: moisturizer/humectant
  • phenoxyethanol: serves as a preservative in many personal care products
 (source: My Dad the Chemist)


(Oh man! I am so getting in touch with Miss Emily!)

I've talked before about how I "listen" to my skin. Within minutes of using most products, I can tell whether or not my skin likes it. If something dries me out, oilies me up, or irritates me in the slightest, I'm done. There are only a few brand items that I can use on a regular basis that don't cause one of those problems. This is why I usually stick to whipping together my own concoctions. Well, I'm glad that I found this Speedy Oil.

The price on this is super affordable - more so than mixing up my own blends - and the 230ml bottle is generous. That's almost 8 ounces and it only takes a very little bit to cover my entire face and neck. When I need to, I can purchase a refill pack.

Another benefit I discovered with this is that I find myself massaging my face more when applying. The texture is so smooth and soothing that I can't help but spend at least a couple of minutes doing a vigorous massage.

When I use my own oil blends, I have to be careful to remove most of it so as not to cause a breakout. The Speedy Oil wipes off well with a tissue or baby wipe and doesn't leave behind any clogging residue.

One thing I do want to point out is: do NOT use the oil near your eyes. I got some on my waterline and had some irritation for a couple of days. Now I just keep about a quarter inch away from my eyes when I am massaging this in.

I'm pretty thrilled with the product. Having discovered this and the Kikumasamune really makes me want to look at more Asian skincare products. Too bad the makeups are never in my shade range!

Peace
--Free


P.S.
I was chatting with a friend about this product and she mentioned that she too loves Asian products of all kinds. She lives in a major U.S. city that has one of those huge sub-city "Little Asia" market areas. I remember going there when I visited her some years ago. I wish I had focused more on shopping than eating! She is going to see about scouting out some products for me. Also, for those of you are interested, Reddit has a category for Asian Beauty. I will be checking that out for sure.