Translate this blog....

Showing posts with label breadmaking. Show all posts

Wednesday, July 08, 2026

**BREAD MAKING** Artisan Bread Is SO Easy (Kind Of)

Part 1

Recently I fell hard in love with the Bistro bread Aldi has been selling. I had tried the Rustic Italian Boule, and it was okay, but the Bistro bread - next level good.

I bought 2 loaves of the Bistro bread in about 4 weeks. I got into the habit of either buttering it or spraying it with EVOO (my favorite method), then toasting it in the air fryer. I would have 2 slices for a meal, dipping them into some EVOO with roasted garlic. I didn't need anything else; it was so good. I also found it very filling. Sometimes I would have nothing but 4 slices of toast like that - 2 midday for lunch and 2 for my evening meal. Like I said, I was addicted.

The thing is, the store-bought bread runs around $4.50 per, so... yeah, it could get pricey. I decided to look up a recipe, and I was shocked at how simple it seemed. I say "seemed" because my first-time dough is in the fridge for an overnight rest as I write this. Tomorrow will be the real test.

The recipe is literally a mix of 4 things: flour, salt, yeast, and water. That makes me so happy. Also, the dough is a no-knead type. That makes me really happy. 

It took me less than 10 minutes to round up and measure everything for the dough. After a couple of minutes of mixing everything together, it was ready for the first rise. I set it out to rise on the counter before I realized how fatigued I was. A quick search informed me that putting it in the fridge overnight (for 16-48 hours) makes for an even better flavor and texture. Sold! 

Tomorrow, I will take it out and let it set for a couple hours before I do the 2nd (shorter) proofing. I'm going to be baking it in my cast iron Dutch oven. This will be the first time using anything to do with my stove since I got the air fryer.

I will finish thing post tomorrow, God willing I live and nothing happens, adding photos of the finished thing. I'm going to be thrilled if all goes well because it's going to be a money-saver. I love the idea of 1) not having to knead dough, 2) being able to create such wholesome bread, and 3) not having to spend all that money on store-bought.

Honestly, if the Bistro bread turns out, it will be a long time before I bake any other kind. I love the thick, chewy texture of the Aldi loaves. And I'm using my French-milled flour and sea salt, so I feel great about the ingredients. It all fits right into my Food Revolution attitude.

I'm stopping here to get some rest for the evening. Next up... the bread!

Part 2

So...

I have taken the dough out of the fridge to come to room temp and finish the first proofing. It has been about 17 hours since it went into the fridge.

Just out of the fridge
It has gotten fuller than when it went in. Pre-fridge it was looser looking and smaller. I hope this is what it is supposed to look like! ðŸ˜¬ I am going to check in in an hour to see if it has warmed up. The instructions say to let it rest out of the fridge for 2 to 3 hours.

Part 3

I forgot to take a picture of the dough when it was ready. It was really sticky and no matter how much I floured my hands, it was rough going I think enough stuck to my hands to make a tiny loaf! ðŸ«¤

Another thing I had trouble with was that the instructions were to preheat the oven at 450F with the Dutch oven inside... I always wipe mine down with a little oil before I put it away so the smoke got crazy. 

Finally, the dough seemed ready to go into the oven. The test that it's ready is that it springs back slowly when poked. I wasn't sure how slow they were talking so... I took a guess that it was slow enough. Into the oven it went. 

The instructions were to bake for 30 minutes lid on for the steam factor, the lid off for another 10 minutes. I put in a temp probe and set it for 200 The suggested done temp was anywhere from 180-210 depending on preference. Preference? I don't have a preference yet. I guess the time varies based on how crusty you want the bread to be? I mean, I'm guessing for real. This is what I get for getting vague directions from some random website that doesn't have enough info so that I have to go to more sources. 

Anyway.

Part 4
I went with my gut on the 200 and the bread looks... okay?
Not bad? I don't think.
Other than the very visible holes where I stuck in the probe, it is decent looking. I know right off that I didn't use enough of the dough, but I will do better next time. 

I learned from this and next time I will do some things differently:
  • I will make sure my Dutch is dry
  • I will probably not use the overnight method
  • More flour, more flour, more flour - because I think started with the dough too shaggy in texure
  • Last of all, I will not let the parchment pinch into the dough as much
The final thing was letting the baked loaf rest long enough to be ready for cutting. This was going to be the real test. If the bread tastes horrible, I have got to find out where I went wrong. 

Part... Ta-da!!!
The first thing I noticed when I cut a slice is that the bottom was very tough. I think that had to do with my pan and the parchment because the loaf stuck a little to the paper. It looks good except it doesn't have all those beautiful holes like the store-bought bread does. Also, it is a teeny bit dense - like I could have left it in the oven another 4 or 5 minutes more.

When I went looking for reasons, I got a lot of possible ones. I might need to use more water (doubt that), or I over-handled it (very possible because I found it hard to work with), or - and I think this is the main culprit - I didn't have the heat high enough. That and I probably under-proofed it - remember that I couldn't decide how quick the spring-back was! And I forgot to mention that my crust softened once it the loaf cooled.

As far as how this tastes, it's not bad - a little saltier or sourdough-y than I like. I'm going to finish this loaf by making toast and maybe some homemade croutons, then I will try again. All in all, I'm not too disappointed with this first-time go round.

When I find a complete (and better) recipe, I will be sure to share it.

Peace
--Free


P.S.: My SIL was over & she said my bread is really tasty!


Tuesday, January 12, 2021

**REVIEW** Hamilton Beach 2 Lb Digital Bread Maker

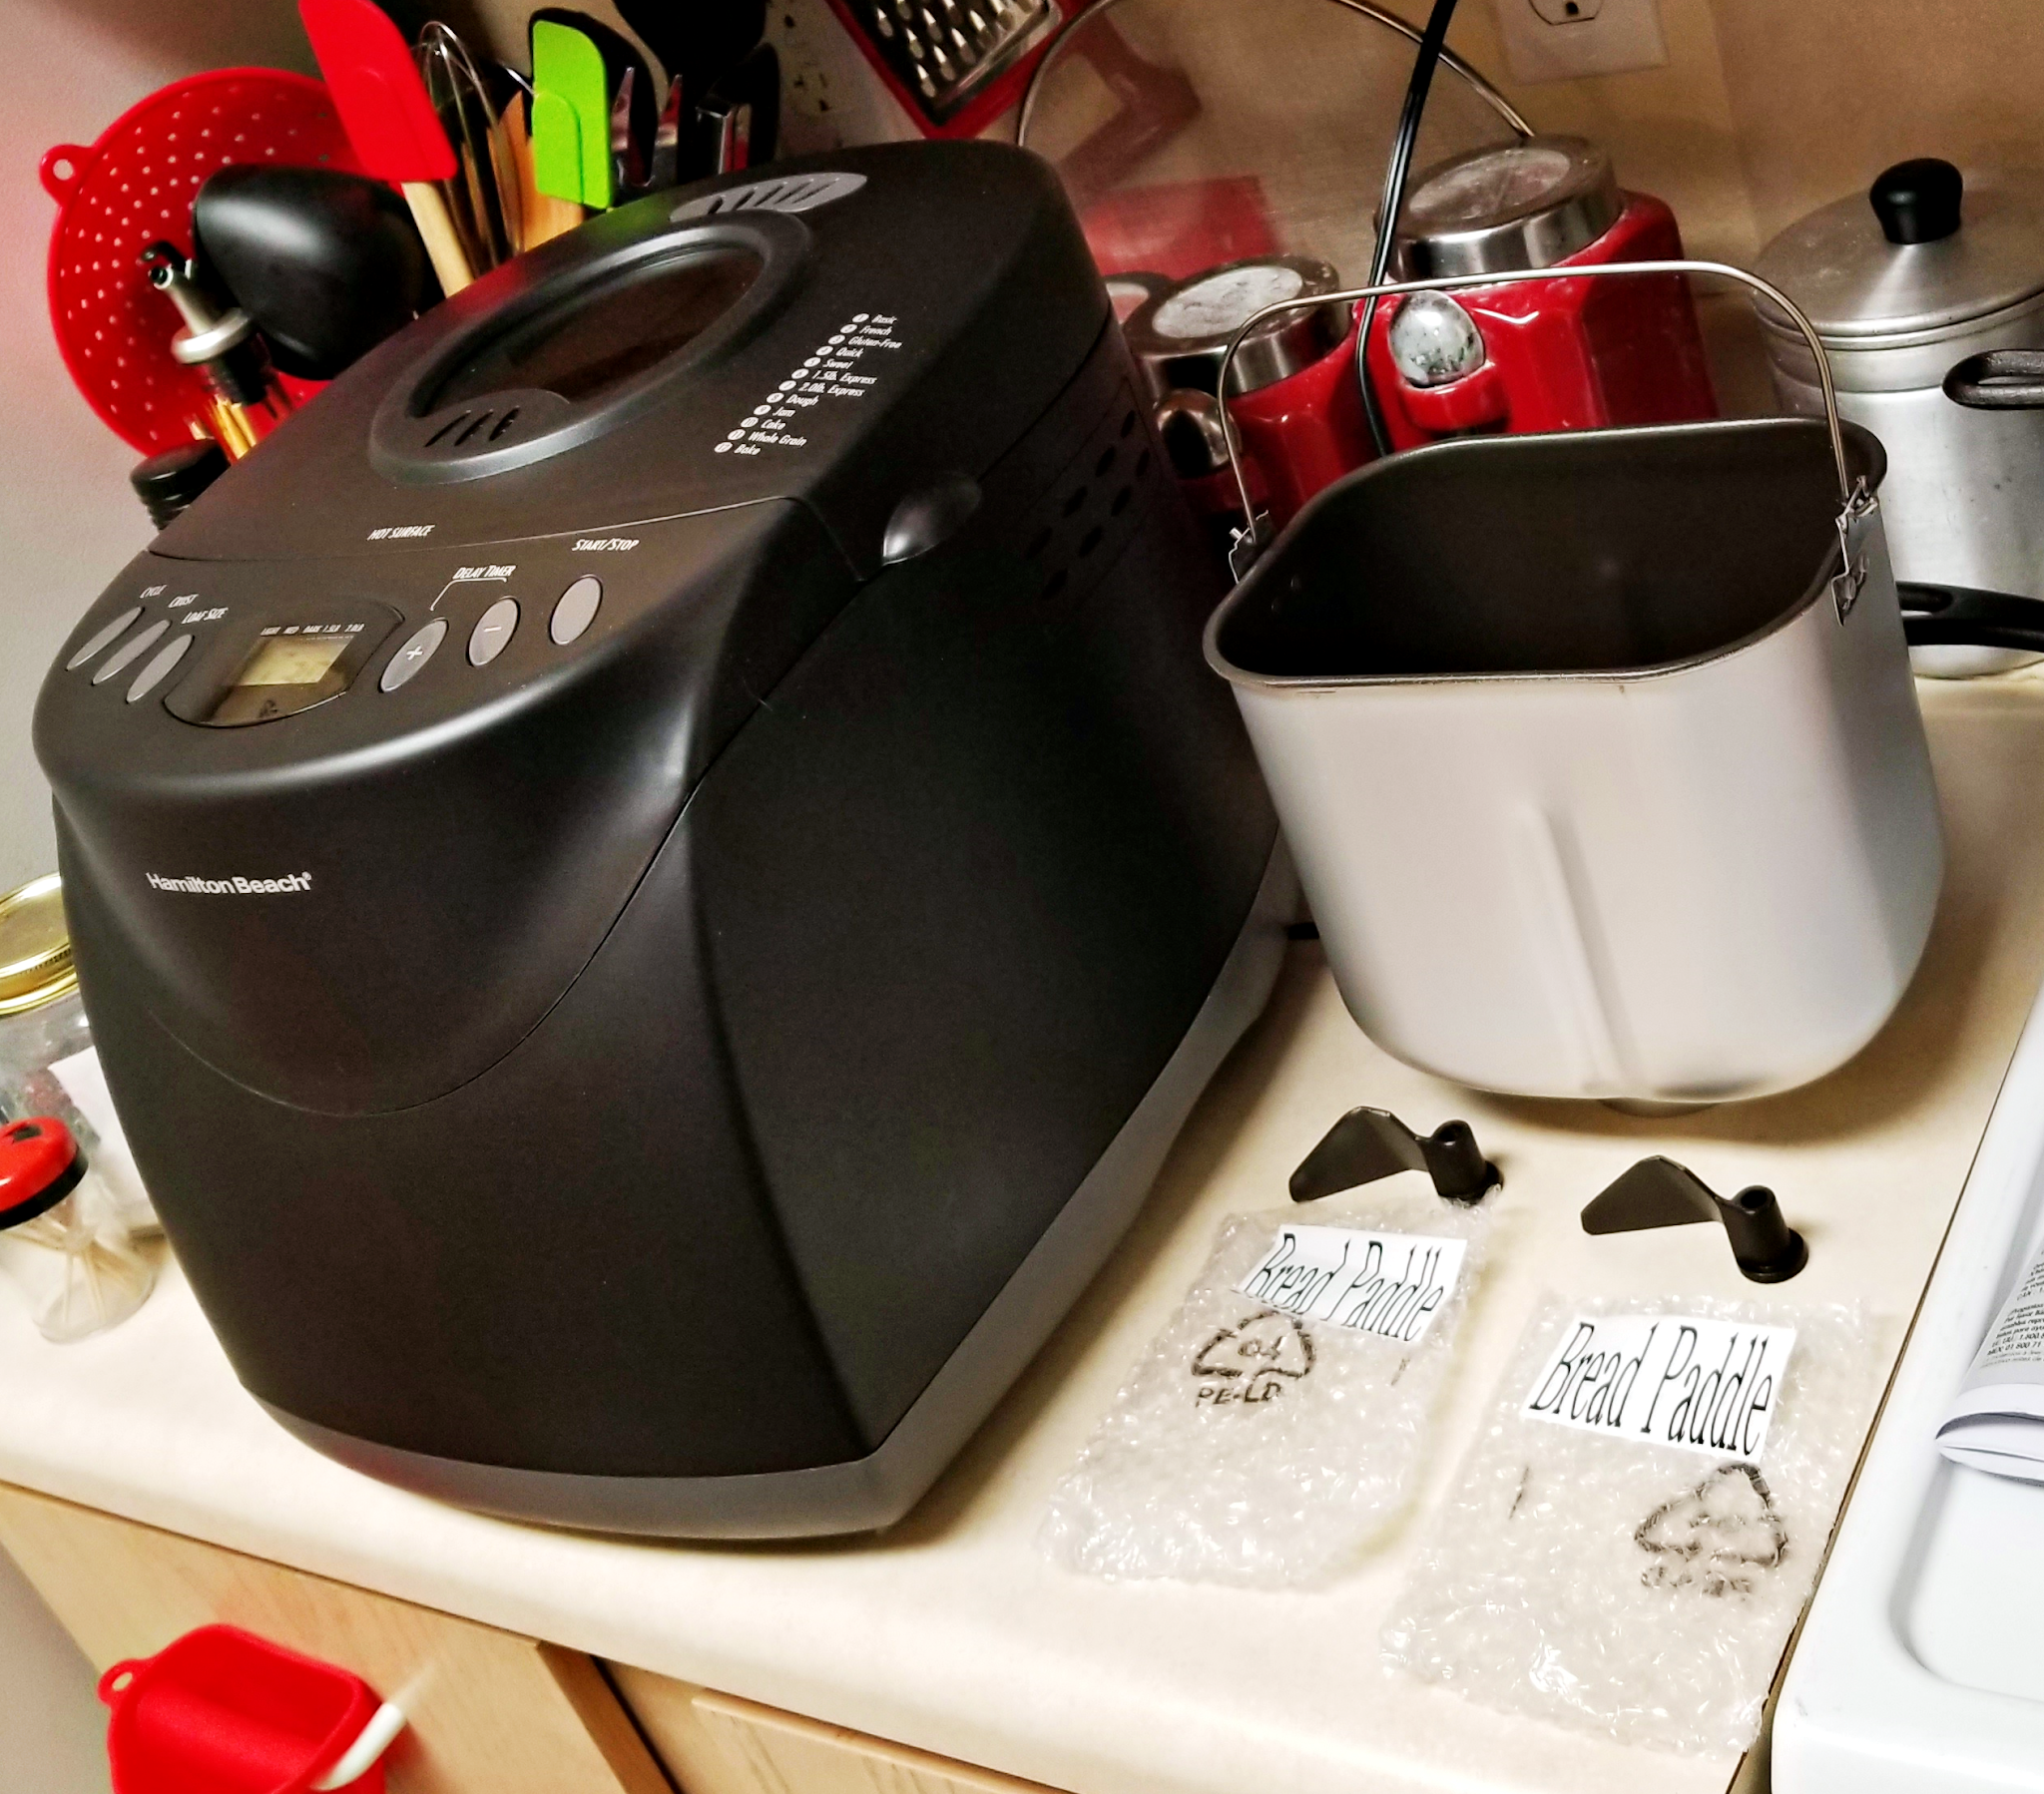
 As mentioned in a prior post, here is my review of the breadmaker that I got for Christmas.


The machine, the bread pan and
2 kneading paddles

You can see the controls beside the LED
and 12 usage options along the 
top left side

I chose this one after looking at a bunch of others because:

  • The features, especially being programmable and being able to make a variety of items.
  • The price was reasonable & I didn't want or need the fanciest, priciest machine from my family.
  • Things mentioned in less-than-glowing reviews didn't really put me off.
  • It looked easy to clean.
Now that I have the machine and have used it, I'm really pleased with my choice. I can add these to the positives:
  • Incredibly easy to use. I was sweating and stressing but as soon as I started, it was a snap.
  • Even though it's quite large and my kitchen is small, I have found a counter for leaving it out on and a space for storing it away. And, believe, me, my kitchen is almost too small to cuss a cat in.
  • It's very quiet. I have one annoying and noisy neighbor who I always complain about. I didn't want a machine that made me look bad. I can use this thing at night and it wouldn't wake anyone in the apartment.
There are some things I wish were better, but they don't ruin my experience. These include:
  • The LED display doesn't show where in the breadmaking cycle the machine is at. I have to pay attention to the alerting beeps if I want to add seeds/nuts or remove the prepared dough for baking in the oven. (I sometimes want a loaf made in the cast iron or fixed into a particular shape.) I also like to remove the bread after the last kneading so that I can remove the paddle. That way, I don't end up with that hold at the bottom of my finished bread.
  • Since my recipes include a lot of seed/nuts and mixed flours, I do have to open the machine sometimes. I do this to see if I need to scrape down the ingredients. For my thinner doughs, I have not had to do this.
  • Hamilton Beach does not have one of the silicone-scraper kneading paddles. As a matter or fact, there are no accessories for this machine as far as I know.
Not much to complain about there. Also, the beeping is fairly loud so I can listen for when to add things or remove the paddle.

As I said, this is a pretty quiet machine. Here is what it sounds like (and you can see that I am standing right above it filming):


Basically, I can run this machine in the kitchen and just barely hear it from the bedroom about 12 feet away with the door open. Tiny apartment living can be challenging so this is a Plus.

Here is one of my first loaves of bread because I ate the 2nd loaf without getting photos!


Whole wheat & white flour; turmeric, chia seeds, sunflower seeds, 
and flax (seed and ground).

My play on an Ezekiel Bread type of loaf. With a twist!


I got the basic recipe online. and added the turmeric.

 Now that I have gotten comfortable, I will be modifying all recipes with nuts, ancient grain flours, and as much healthy stuff as I can think of. I don't want to live by bread alone, but I want to enjoy every piece of bread I eat.

I have not even thought about how to use all of the functions yet but here are the choices:


Glad the option is there but I 
won't be using the gluten-free...


The Basic cycle is what I used to make my first loaves of bread. I plan to try doing a Brioche-style loaf soon though. But the thing I am most excited about is that Jam setting. 

I first thought that the Jam setting is the one I would never use (I mean, after the Gluten-free option), but I have watched videos showing how easy it is to make jam in these things. Of all the methods I watched, the easiest recipe was this one:
  • Fruit (fresh or frozen but I am going to use unsweetened canned pineapple)
  • Sugar (anywhere from 1 to 4 cups. Apparently, sugar thickens the outcome if you aren't using pectin)
  • Lemon juice. 
I have seen some recipe videos where people acted pectin to thicken the jam. Since I plan to make very small batches, and I don't want a lot of sugar, I will use either no pectin or a sugar-free version. Also, I am cutting way back on sugar - which is why I'll use pectin at all. This lady here had the most no-nonsense recipe for beginners, in my opinion.

One of the best marmalades I ever had was one I found back home in Anchorage. It was a pineapple-orange marmalade that I've never found yet in Iowa stores. 

Oh, and this machine makes both jam and jelly...

Thanks to Spruce Eats, I understand the differences between jam, jelly, and marmalade:


The more you know...

So that's is all about this amazing bread machine.

The price has been swinging all over the place for the past year. I started looking at this one about 6 months ago when the price seemed to hover between 80 to 90 dollars. When I sent my family the link, the price was around 90 bucks.  I almost changed my mind and when I made the final decision, the price was down to 80 and some change. Not bad, right? Well, when I just now went over to grab the link for this post, the price was sitting at 70 dollars. Crazy.

Still, it is worth what it cost. If I was able to buy it for myself, I would not have been mad about paying $100. If you have priced Ezekiel Bread (or any other good quality bread) lately, you will see how fast the machine pays for itself. And with the jam? Shut UP!

Next time, I will be reviewing the Stand Mixer that was my second gift.

Peace
--Free